Sunday, December 21, 2008

Pecan Tassies

Pecan Tassies are a little family favorite that I have been making as long as I can remember. But I'm pretty sure that's only because I got tricked into it.

These cookies are delishous "mini" pecan pies. They are bit sized and always requested. However they kinda take forever to make...

Once the dough is made you have to press it into the tins. You have to have the 'right' thickness; too thin and the cookies will break with the weight of the filling, too thick and the crust will push all of the filling out. So you just have to practice and take your time. Growing up I got a lot of practice around Christmas. It was always a busy time and somehow I got the job of making these each year. Now with all the practice I can turn them out pretty fast.

The memories of all those years comes back with each tin that gets pressed out and each smell of the baking almond crust and pacan filling. I smile every time I make these... even if they do take an entire night.

Pecan Tassies
1/2 c. butter
1/2 c. sugar
1 egg
1/2 tsp almond extract
1 1/2 cup flour

Filling
1 egg, beaten
1/3 c. sugar
1/4 tsp salt
1/3 c. dark corn syrup
1 scant tbsp butter, melted
1/2 tsp vanilla
1/3 c. chopped pecans

For the tarts cream the sugar and butter together. Add egg and extract, blend well. Stir in flour slowly. Wrap in plastic and let chill in refrigerator for 30 minutes. Spray Sandbakkelse pastry tins with non-stick spray. Take a small amount of dough and press into bottom and sides of the time with thumbs. The dough must be thin about 1/16 in.

Melt the butter for the filling in a medium bowl. Add the rest of the ingredients and mix well. Fill the tarts 2/3 full and place the tins on a cookie sheet. Bake 25 minutes at 350 until the edges are slightly brown. Let cool in tins for about minutes. Remove from tins onto a cooling rack.

Can serve warm or cold. Store in a air tight container for up to one week. Can freeze and thaw.

Sunday, December 14, 2008

Cookies, the Christmas Currency

The holiday season always brings out the baker in me. I tend to bake things that don't really require measuring, but when I came across this recipe I decided to try it for a cookie exchange I had coming up. Normally I would make Pecan Tassies, a family favorite, this year I decided to mix it up a bit. Although I've already been told that I have to make Tassies this week, cause it just aint Christmas without a big batch of mini pecan pies taunting you each day...

I'm a sucker for orange and chocolate flavored deserts, but this quickly became a runner up in the chocolate combination. Since this called for peppermint I decided to add some coloring to go along with the flavor. Altough red and green or even red and white (if you used white chocolate) would be just as cute.

What I liked best about this recipe was that I could make the dough ahead of time. I mixed up, rolled out, and spiraled up the 'log' on Thursday and baked the cookies on Saturday morning. It was a really nice change of pace from the normal all day cooking-fest that I usually have. I think they are better cooled, so make sure to let them rest before serving.

Chocolate Peppermint Pinwheels
3 c. Flour
3/4 tsp baking powder
1/4 tsp salt
1 c. butter
1 c. sugar
1 egg
1 tbsp milk
Vanilla
1 egg yolk
1 tsp peppermint extract
3-6 drop green food coloring
Chocolate
3 oz unsweetned chocolate
1 tsp vanilla extract
Soften butter in a large bowl. Add sugar and whip till frothy. Add milk and egg. Slowly add in the baking powder, salt, and flour until mixed. Divide the batter into two parts. To one add the yolk, peppermint extract and food coloring. Fold by hand to combine. To the second half add melted chocolate and vanilla extract. Wrap each half and refrigerate for 30 minutes.
Roll out halves into rectangle shaped sheets. Place the green half onto of the white and roll length-wise creating a long log. Wrap and store in the refrigerator for at least 2 hrs or days.
Remove and cut into 1/4 inch slices. Bake in a 375 degree preheated oven for 12 minutes. Let cool and store in air tight container for up to 1 week.

Saturday, December 6, 2008

A lot like Christmas

Oh yes, it's begining to look a lot like Christmas around our house. The stockings have been hung, the snow is falling, the tree in a box has been opened and the pine scented candle lit. Now ofcourse I would love to have a real tree, but our holiday schedule and the stay at home puppy just does not allow that.

The synthetic tree does have it's advantages. If that akward shapped ornament just won't fit between the branches, well bend the wires a little bit and now it does. Clean up is also a breeze. There aren't any annoying little needles laying around poking your slipperless feet. We still get to put lights up and hang all the decorations.

Christmas decorations we are not short on. Most of which I will admit are stolen from my mother. This year when I pulled out the boxes I was very surprised to realize how many there were. Each box brings a smile and a little excitment when it gets opened.

The Christmas house collection by Dept 56 is always fun for us to set up. The little elf houses have so much detail and cuteness that we just sit and stare at them, listing out our favorite peices. The new bookshelf that we had installed is a perfect place to showcase them.

The little pupy Madison wasn't quite sure what she thought of all the new items or the moving of all the furniture around. Like other dogs she believes that anything under 3 ft belongs to her and should not be meddled with.
She should enjoy the decorations. I've been collecting different Reindeer items now that we have a house to set up. Historically Finnish Lapphunds were bred to hunt and herd reindeer, but somehow they are just less interesting than the real deal.
The antique sleigh bells are slightly more fun since they make a fun noise and so do I when she noses them.

Now the next thing to make the holidays even closer are all the cookie exchanges.... bring on the sugar rush.

Friday, December 5, 2008

Thanksgiving Take Two

Now that we've wrapped up our Thanksgiving traveling I can spend time to post about the fantastic foods we were served in Chicago. The Thursday meal was a classic delishous serving complete with turkey, chestnut sausage stuffing, mashed and sweet potatoes, cranberry sauce, and pumpkin pie. It was a wonderful trip and a great chance to spend time with family and friends.

A classic favorite my in-laws introduced me to was Spinach Turkey Pie made from the leftovers. The rich flavors mix into the perfect texture and it's a complete change from the standard turkey leftovers that you are most likey to have.

It was an instant hit with me and every Thanksgiving we are there I look forward to scarfing down at least half a pie pan of it. My father inlaw makes it with great care and presicion, usually letting me eat all I want...

Tart Shell

2 c. flour
1/2 tsp salt
1 1/2 sticks butter, cut into pats
1 large egg yolk
3 tbsp water

Place the flour, salt, butter and egg yolk in a food processor with a blade and pulse 10 times or until mixture resembles corn meal.
Add the water and pulse just until the dough begins to form a ball, about 8 times. Do not overprocess.
Form mixture into a ball. Divide dough in half and shape each into 5-inch discs. Wrap each in plastic wrap and refrigerate for at least 30 minutes.

Turkey, Spinach and Ricotta Tourte

1/2 c. parsley leaves
2 oz Parmesan cheese
1 medium onion, quartered
1 large clove garlic
1 lb spinach
1/4 c. water
10 oz Turkey meat
salt and pepper
2 tblsp butter
4 oz bacon, cut into 1/4 inch peices
2 large eggs
1 1/2 c. ricotta cheese - about 12 oz
1/4 c. heavy cream
Tart Shell
1 large egg lightly beaten with 1 tbsp water for glaze

Mix parsley and cheese in a food processor until finely chopped. Transfer to a large bowl. Chop garlic in processor. Add onion and pulse with garlic until finely chopped. Reserve.

Cook spinach in the water until just wilted. Drain and squeeze dry. Coarsely chop the spinach and reserve.
Heat turkey meat in a pan and season with salt and pepper. Reserve.

Melt 1 tbsp butter in a large skillet. Add bacon and cook till brown. Remove bacon draining off any fat. Add to parsley-parm mixture.
In the same pan cook the onion-garlic mixture until soft and slightly brown. Stir in the remaining butter and spinach. Cook until heated through. Season with salt and pepper. Add to parsley-parm mixture.

Process the eggs, ricotta and cream. Add to the above mixture. Fold in the diced turkey. Taste seasonings and adjust.

On a lightly floured surface roll half the Tart Shell dough into a 13-inch circle or until it fits your tart pan size. Place in tart pan and press against the sides. Spoon in the turkey mixutre. Roll out the remaining dough and place over the mixture. Moisten the edges of the top and bottom crusts and gently press together. Crimp the edges over forming a seal. Lightly brush the top with egg-water glaze. Cut a 1/2 inch circle in the center of the top crust.

Bake the tourte on a baking sheet in a 425 degree pre-heated oven for 15 minutes. Reduce heat to 350 and continue to bake for 1 hour. Cover tart loosely with foil if it starts to brown too much. Remove from oven and cool to room temperature. Serve in wedges.

Wednesday, November 26, 2008

New Twist on an Old Favorite

Thanksgiving… a meal like non-other, comforting and filling; yet many years it seems like the same dishes over and over again. You have your turkey with stuffing, hopefully not too dry. There’s mashed potatoes and gravy. Generally a green bean casserole. Rolls or bread. Throw in some pumpkin and apple pie and your meal is complete.

Completely boring say some.

So what to do? Turkey’s can be basted with fruits to add more flavor. Potatoes mixed with garlic and chives are always a favorite. Why not do a Asian green bean toss instead? Or try some pumpkin muffins and serve a berry pie for desert. All fairly simple substitutions. Some you may hold onto, others stick with the original and you can’t go wrong. But the stuffing… oh the stuffing is something to experiment with!

Remember the Focaccia bread I promised to reuse? Well here’s what became of the rest of it. It was a pre-Thanksgiving meal at our house featuring Louie's sausage and canned beef stock.

Since we are traveling to Chicago for Thanksgiving we took a little time to make our own Turkey a few weeks before. We then spent the weekend in Wisconsin helping my parents around the farm and setting up for their own family meal. No matter how you slice it Thanksgiving reminds us to be thankful and spend with those you love, even if you’re not with them.

Apple Sausage Stuffing
1 loaf Focaccia bread
3/4 cup crushed Italian bread crumbs
3 tbsp Olive Oil
2 carrots, washed and peeled
3 celery stalks, washed
1 large onion
1 green bell pepper
2-3 golden apples
1/2 lbs Italian sausage
3 cloves garlic
1 egg, beaten
1 tsp sage
1 tsp rosemary
3 cups beef stock
Salt and pepper

Cut Focaccia bread into large cubes. Broil in oven on a baking sheet until golden and crispy, do not burn. Remove and let cool in a large bowl.

Heat a large skillet over medium heat. Brown the sausage and remove. Cut up into small pieces if not using ground meat. Add to the bread bowl.

In the same skillet heat the olive oil. Cut up the carrots, celery, apples, pepper, and garlic into bite sized peices, mincing the garlic. Add to the pan and sauté on low until heated through and tender. Add to the bread bowl with the Italian crumbs, beaten egg, herbs, salt and pepper.

Fold gently until mixed. Add the stock slowly until absorbed, mixing gently. Do not over mix.
Place in a sprayed pan that fits the amount you have made.

Bake covered at 350 degrees for 30 minutes. Remove cover and bake another 15 minutes or until top is browned slightly. Can broil if crispier stuffing is desired.

Thursday, November 20, 2008

Season of Squash


With the abundance of squash during the fall comes a flurry of orange and yellow dishes. My recent favorite features roasted Butternut squash and Louie’s Italian sausage. It was based on a recipe from here, but modified to my personal taste and texture. Again, I used the canned beef broth I made.

Roasted Butternut Squash and Sausage Soup
1 large butternut squash, about 3 pounds, halved, seeds removed
1/2 pound Italian sausage (~3 whole links)
3 tablespoons extra virgin olive oil
1/2 teaspoon salt
Freshly ground black pepper
1 large onion, chopped
6 cloves garlic, minced
1 tablespoon chopped fresh rosemary, chopped
3 cups beef broth
1/2 cup heavy cream, or more to taste

Preheat the oven to 400 degrees F.
Lightly coat the squash halves with 1 teaspoon of the olive oil, salt, and pepper on both sides. Place cut-side down on a baking sheet lined with tin foil. Bake until fork tender, about 30-45 minutes, remove from oven and let cool. When the squash has cooled enough to handle, scoop out the flesh and reserve.

In a medium saucepan over medium-high heat sauté the sausage till browned, remove and cut into small pieces. Add remaining olive oil to the pan and cook the onions until soft and opaque. Add the garlic, sage and rosemary; cook, stirring, for 1 minute. In a large soup pot, add the onion mixture, cooked squash, 1/2 the sausage mixture, and chicken stock, stir well to combine, and bring to a boil. Reduce the heat to low, and simmer for 30 minutes, stirring occasionally.

With a hand-held immersion blender, or in batches in a food processor or blender, puree the soup. Add the cream and remaining sausage pieces. Adjust seasoning to taste and add water till thickness desired.

Serve the soup in bowls, garnished with more chopped rosemary leaves.

Wednesday, November 19, 2008

It's A Softie Christmas

Peek-a-boo! It's a Christmas Basket full of softies! And it’s getting crowded!

Each year my aunts hustle and bustle, cut and glue, snip and stretch tables full of items to stock a little log house on a Christmas tree cutting farm. The farm is owned by a family which has been a long time friend to ours. Each year we trample through the snowy rows of trees (if we are lucky), searching for the very very best Christmas tree ever. After you’ve tagged your tree you can warm up in the cabin with some hot chocolate… and… there just happens to be cute things for sale!

I was inspired by the softies that Allsorts creates, so I tried to do some little versions myself. I came up with a modified Penguin and Puppy, Squirrels, Owls, and Acorn Elves. You can see the elves above, hiding in a forest of my Grandfather's carved wooden pine trees.

I used a variety of felt fabric, with the exception of the Owls who had cotton material. Each squirrel has a hand-picked sparkly acorn; the Owls are sporting felt holy bunches; and the Elves have small unique items.

The Owls started as a patch-work quilt-like project. Each little blue-ish white square was cut out and then sewed together. I attached a felt backing and added more stitching across the pattern.

I cut the front of the owl pattern out and then sewed the rest of the felt body together on by hand. The eyes and nose are from remnants pieces. The holly bunch just made them more festive!

I tried experimenting with different stitch patterns on the penguins, each more tedious than the last. I finally settled on just plain birds with the same cute little nose that the owls have.

A couple ‘special’ squirrels have embroidered holiday icons (Christmas tree, holy bunch) but this too got quickly intensive and was given up. Since I was trying to punch out a variety of different options I didn’t want to spend too much time on something that may not go over well. We’ll see how they sell!

Merry-pre-Christmas from the basket of animals!


Tuesday, November 18, 2008

Pasta Puttanesca - The "scandalous" dish

Pasta Puttanesca… A delicious dish with a scandalous origin. It’s said that ‘loose’ women in Naples would cook this fragrant concoction from easily accessible ingredients in order to draw sailors in. Regardless, it is an incredibly simple dish to make with an abundance of flavor.

The original recipe calls for capers, but a genetic aversion to certain foods starting with the letter ‘c’ (ie: capers, cilantro, coconut, cloves) made me leave out the little green devils. I’ve also taken the time to make my own pasta. It always brings back memories with my sister growing up; stringing clothes hangers and clothes hangers full of fresh pasta. Once you get a knack for it, it really isn’t too bad of a process.

The focaccia bread was a new trial. I’ve been having a tough time getting my bread to rise recently, so I thought, ‘fine, I’ll just embrace the flat bread and go with that for awhile.’ Thankfully I found a lot of use for the loaf; I’ll post what the remainder turned into later.

Pasta Puttanesca
2 tbsp extra-virgin olive oil
2 chicken breasts
1/2 teaspoon crushed red pepper flakes
4 to 6 cloves garlic, chopped
1/2 small onion, sliced thinly
3-4 anchovy fillets
10-12 Kalamata Olives, pitted and halved
1 (14.5-ounce) can stewed tomatoes, drained and slightly pureed
1/2 cup cream or milk
Kosher salt and freshly ground black pepper
2 tbsp Rosemary
1/2 cup Feta cheese
1 pound spaghetti, cooked to al dente

Heat a large skillet over medium heat and add oil and crushed pepper. Cook chicken breasts till done. Remove from heat and let cool slightly, cut into bite sized cubes. Add garlic, anchovies, and onions to previous pan. Sauté sauce until anchovies melt into oil and completely dissolve and onion is tender, about 3 minutes. Add chicken, olives, tomatoes, cream, and rosemary. Bring sauce to a slow bubble, reduce heat, and simmer 8 to 10 minutes.

Add cooked fettucini pasta to the sauce with 1/4 cup of the Feta. Let cheese melt and pasta absorb some of the flavor. Serve with bread and more feta cheese.

Homemade Pasta
2 eggs
3 1/2 cup flour
1/4 tsp salt
2 tbsp olive oil
Knead all ingredients together on a flour dusted surface for 5 minutes until they form a ball which is not sticky. Wrap in plastic and let sit in refrigerator for another 1/2 hr. Using a pasta attachment or other tool roll out to 1/4 of an inch thickness on a floured surface. Cut into long strips or use fettuccini attachment. Let dry on a rack for 1/2 hr.
Bring a large pot of water with salt to a boil. Add pasta and stir, let boil for about 1-2 minutes or until pasta floats. Strain.

* A fury little kitchen helper is not required to gaurd the pasta.

Caramelized Onion Foccacia
6 tbsp olive oil
1 large onion, chopped
Kosher salt and freshly ground black pepper
1 (1/4-ounce) packet active dry yeast
1 tbsp sugar
1 cup warm water
1 teaspoon fine salt
2 1/2 cups all-purpose flour
1 cup wheat flour
1/4 cup rosemary, chopped

Preheat the oven to 350 degrees F.
For the onions: In a large skillet, over medium heat, add 2 tbsp of oil. When the oil is hot, add the onions. Season with salt and pepper. Sauté until caramelized and brown, about 15 minutes, stirring occasionally. Remove from the heat and let cool.

For the dough: Using large bowl, mix the yeast, sugar and warm water together. Let sit until the yeast has risen. Add 2 tbsp of the olive oil, salt and flour. Mix dough until it starts to form and come together. Oil the bowl with 1 teaspoon of the olive oil. Place the dough in the bowl and turn once, covering with the oil. Cover the bowl with towl and place in a warm, draft free place until the dough doubles in size about 1/2 - 1 hour. Spray grease a 9x9 inch baking pan. Punch the dough down and press the dough out into the pan, using a small wooden spoon handle (or your finger) push small depressions into the dough.
Brush the dough with remaining 1 tbsp olive oil. Sprinkle the dough with kosher salt and black pepper. Spread onions over the bread evenly. Sprinkle with the rosemary. Bake the dough for 30 to 35 minutes or until the crust is golden brown.
Let cool on a rack. Slice and serve.

Thursday, November 13, 2008

Butternut Squash Ravioli


Easy dough recipe

2 eggs

2 cups flour

1/4 tsp salt

2 tbsp olive oil


Squash Filling

1 roasted, deseeded squash

1/2 cup cream or milk

1/4 tsp salt


Mix all ingredients in the dough recipe together. Add water till just combined. Knead slightly until the dough forms a ball. Let sit in a covered bowl 30 minutes. Knead with more flour till non-sticky, let cool in fridge for better rolling.


Half and deseed the butternut (or summer) squash. Cover with olive oil, salt, and pepper. Roast at 350 degrees in oven for 30-45 minutes or until fork soft. Remove, let cool, scoop out filling to a medium bowl. Add cream and salt. Mix well until creamy.


Using a pasta attachment (or rolling pin) roll out a portion of the dough into a long strip. Take 1/2 spoon fills and stager on 1/2 of the strip, leaving the other half empty for folding over. (Don't fill too much or it will leak out when cooking)


Using the whites from one egg and a little water, mix till frothy. Brush between the filling around edges. Fold dough strip over and press firmly between the filling scoops, removing all air pockets. Using a ravioli cutter (pizza cutter will do fine also) trim off the excess dough. Lay ravioli out on a baking sheet covered with parchment paper (they can be frozen at this time for up to 6 months).

Repeat until dough or filling is used up. Will make about 60 raviolis depending on size and dedication.


To cook heat a large pot of water with salt till boiling. Add pasta. The ravs are cooked when floating on the top. Fresh pasta cooks much faster than store bought, so be prepared to remove quickly (about 3-5 minutes).


Recommended to be served with a Pesto Sauce (also can be frozen nicely).

Wednesday, November 12, 2008

Onion Soup - Antique Style

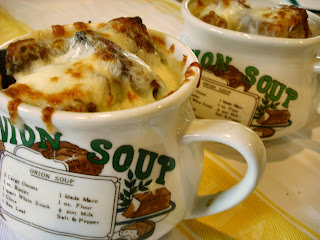
There aren't many things more comforting than a nice warm cup of soup on a cold day. And when you combine a steamy rich broth with melty cheese and crispy bread crumbs it just warms you up all over.
Onion soup is one of those dishes.

Shopping at a local antique store on near my parent’s farm is always a weekend visit must. There are new treasures on every visit, many of them from the rural Wisconsin farm community, passed on through the generations.

Scanning the shelves packed with dishes I spotted these little soup cups. There was a set with listing recipes for Chicken, Cheese, and Onion Soup. I scooped up the Onion's and waited through the summer till fall.
Finally the weather cooled down and a request for more heart-warming dishes rang in the kitchen. The canning season which was just completed came in handy for that cooked all day taste.

We fired up the stew pot, simmered the onion broth till the house smelled in each room, roasted homemade bread crumbs, melted the cheese, and tried to resist burning our tongues on the steamy soup pulled from the broiler.
It might be the nostalgic soup dishes, but it warmed us to our toes regardless.

Onion Soup
6 medium onions, sliced thinly
2 tbsp olive oil
2 tbsp butter
4 tbsp flour
3 cups chicken or beef stock
1 bay leaf
1/2 tsp sage
1/2 tsp rosemary
1/4 cup cream
1/4 cup milk
Toasted bread crumbs
Mozzarella cheese
salt and pepper to taste

In a large pot heat the onions with the oil till soft. Add the flour and allow to stick to the onions. Add stock, bay leaf, herbs, salt, pepper.
Let simmer for at least 30 minutes, up to 3 hrs.
Add cream and milk. Let simmer till thickned. Removed from heat and spoon into oven safe dishes, leaving 2 inches from the brim.

Place toasted bread crumbs on top of the soup. Pile Mozzarella over the bread crumbs. Place on a tray and broil till cheese is lightly brown and melted.

Remove and let cool slightly.
Goes well with sandwitches, salads, or as a side starter.

Tuesday, November 11, 2008

Canning through the Seasons

Canning is one of those tasks that makes me think of my Grandma in black and white. Something that seems like it should be done on a prairie or in the bunker of a WWII shed. But canning has become essential for me this season.

A passed down Mirro 8 quart pressure cooker from my mother spawned numerous frantic phone calls as my first attempt to can homemade tomato sauce was riddled with squirts and spirts from the top of the pot’s lid. I was assured that this was normal and no I would not blow a hole through the roof of my kitchen, as my mother and aunt had when they were children. A few minutes later of intent staring led to a less squirty rocking of lid’s weight. A few more after that and the cooker was ready to take off the heat and let cool.

Since the tomato sauce we have canned beef stock, chili, and more sauce. Numerous recipes this season will call for tomato sauce or stock, I will try to point out when I use the canned version, but until I run out assume that I use the homemade version. I am very surprised at how many recipes (not even including soups or stews) call for stock or sauce.

Pressure cooked foods will last well in a cool dark place; the high heat at which they are sealed insures no spoiling will occur. They are perfect for a quick meal that you need a time saver on or for a college kid who wants a home cooked feel, without the effort. You can control the veggies, the thickness, and the spicyness all at once!

Moral of the post: Canning is not for the ancient, nor will it cause a kitchen remodel and is incredibly useful and tasty!

Wednesday, November 5, 2008

Sausage Quiche, this ain't no Lorraine

The original quiche may have come from Europe, but it's influences stretch far and wide. There are many ingredients that can be added to this flaky, pastry-like dish, but the main ingredient is always eggs.

The incredible edible egg. The question of which came first. The answer to many a riddle. Growing up I never really enjoyed eggs, I still turn down a plain scrambled egg even though I very much enjoy making them.

Quiches on the other hand are a whole different beast. They will sustain veggies, meats, and cheeses quite well. It’s a perfect ‘garbage’ meal, something our house always turns to in order to use up the weekly grocery supply.

The dish this recipe follows is a warming savory meal, baked with
Louie's Meats sausage and local University of Minnesota blue cheese. Any combination you can think of would create a wonderful meal or side dish.

I always make a fresh crust from my Grandmother's recipe. The crust works well on savory dishes as well as desserts. By blind baking the crust you can get a stiff, partly cooked shell that will stand up to the expansion of the eggs and blending of ingredients.

Onion Sausage Quchie

2 links Chirizo Sausage (about 2 cups)
1 small Onion
1 cup Red and/or Green Peppers
1 clove garlic, minced
2 tbsp chopped Chives
1 tbsp fresh Rosemary
2-3 washed, peeled Yukon Potatoes
3 eggs, beaten
2 tbsp milk or cream
1/4 cup Blue Cheese, crumbled
salt and pepper to taste

In a sauce pan heat water with a little salt and cook potatoes till done. Remove from heat, drain, and let cool. Once cooled slice in to thin peices.

In a medium saute pan heat cut sausage till done, remove into a large bowl. In the same pan saute sliced onions, peppers, garlic, and chives until done. Add to sausage. Chop herbs and add to mixture.

In a separate bowl beat eggs with milk, salt, and pepper till frothy.

Pre-baked crust using a fresh crust (see below) or store bought. Layer potatoes on bottom of crust. Top with sausage mixture, crumbled cheese, and then eggs.

Bake in a preheated oven at 375 degrees until slightly browned and firm, about 30 minutes. Remove and let cool slightly.

Grandma O's All-purpose Crust
1/4 cup Lard
1 1/2 cup flour
1/4 tsp salt
cold water


Mix first 3 ingredients together well. Add water until flaky. Knead with a little more flour until the consistency of pie dough. Can let cool. Use for pies or pre-bake with pie weights for a crispier crust.