Showing posts with label Canning. Show all posts

Tuesday, February 1, 2011

Dolmades


I used the Grape Leaves!

Back in July, on my parents farm, we harvested (prolly the last growth) of grape leaves from my mom's vines. While this was a little late in the season for the picking, they still looked really nice and I was very excited to have them in the winter to use with the large amounts of hamburger we tend to have in our freezer.

I rinsed the leaves in plenty of water to remove any salt from the canning (very gently!) I'd say 80% turned out with no rips or tears. The larger leaves work the best, so next year we'll have to make sure to pick the big ones!


To make dolmades you simply mix ground beef (or lamp or pork or a mixture!) with uncooked rice and spices. Wrap the mixture in the grape leaves, like you would an egg roll or burrito, it's about a table spoon per large leaf, don't overfill.

Then placing any ripped leaves on the bottom of a dutch oven, drizzle with a little bit of olive oil and place the wraps on top. Cover with about an inch of water, and then cover again with a bowl or large plate. You want the rice to cook and the beef to steam, but not in to large of an area, ideally with some weight on them. This worked for me with the dutch oven and a glass plate, but you could also use a small sauce pan with a tight lid I would think.

After about 30 minutes the water will have evaporated and the dolmades will be cooked.

I didn't add enough spices to the meat mixture, so make sure you make it very flavorful, with oregano, mint, dill or another green herb. Lots of things could be used as a spice.

The leaves were so tender and just fell apart with a fork. Can't wait to try these again!

Monday, December 13, 2010

Tomato Bread


We are a little snowed in here in Minnesota. The above pic is my sister who visited from Tenn last week when we got a bit of snow. The piles are at least 3x as high now. We got 17 inches over the weekend and are still digging out. Ish.

So over the weekend we stayed inside, wrapped christmas presents, watched some movies, and generally tried to stay warm.


We have a lot of left overs and freezer items this time of year. One of those things is frozen pesto and tomato sauce.
A good, simple recipe that I made a few months ago was this tomato bread. You just make (or buy) bread dough, cover it with pesto sauce, slice it into strips, roll it up and place ontop of sliced tomatoes. As it bakes the tomatoes roast into the bread.
Turn it over and serve :)

Monday, September 13, 2010

Califlower Curry


Jen this ones for you.


We've started making our fall soups for the year. Going to farmers markets and stocking up on veggies.

When we went this Sunday we didn't expect to find $1.00/head califlower, but when we did, we couldn't pass up the chance to try out a batch and can the extras.

This recipe is from my inlaws and gets better and better as it sits. Try out a batch before the summer is over!


Califlower Curry Soup

2 tbsp olive oil
1 Califlower head, washed
1 large onion
2 cloves garlic
4 celery stalks
24 oz chicken stock (4 cans)
1 - 2 tsp tumeric
1 tbsp oregano (fresh is best)
1 tbsp thyme
1 tsp salt
1/2 tsp pepper
1/4 cup honey

Heat olive oil in a large pot. Saute onion, celery and garlic till translucent, about 5 mintes on medium. Add califlower, oregano, and thyme cooking till slightly browned. Add tumeric until it coats the veggies.

Add stock, bringing to a boil and cook 10 minutes. Reduce heat to low for 5 more minutes. Turn heat off and add honey, salt, and pepper. Using a stick blender puree till just smooth (can keep texture if you like that)

Reheat to desired temperature. Serve warm. Store for 2-3 days in fridge, freeze or can.

Friday, September 10, 2010

Drying out

We've gotten a lot of peppers (jalapeno, bell, etc) from our CSA share at this point in the season. So last week I dehydrated some peppers in strips to store for the winter.

It's a very simple process: Clean and slice the peppers in to strips or chunks, dehydrate for about 3-4 hours until completely dry and slightly brittle, store in an airtight container.

This could also be done in the oven at the lowest setting (150-200 degrees) for 1-2 hours.

I know I used up all of my peppers from last year before the snow melted and it was so nice to just grab a pinch of dried spicy-ness for pizzas or risotto or breakfast eggs rather than pick up over priced and bland peppers during the winter.

Sunday, August 22, 2010

Ant Work


This weekend was scheduled for canning.

Every year we take a weekend (or multiple) and can tomatoes for the winter months. We visit the Farmers Market / CSA stands and stock up on peppers, basil, onions, and tomatoes. It takes a full weekend to processes everything using my pressure canner, but it's so worth it!

Two full boxes of fresh tomatoes
Assorted left overs from our plant and the CSA

Roast them in olive oil, salt, and pepper

Wonderful with peppers and garlic

Blanching station for de-skining


The final products: Roasted Pepper Sauce, Stewed Tomatoes, Tomato Basil Soup, Tomato Sauce

Monday, July 26, 2010

Fresh from the Vine

Back in May when we went on our Greece trip, we had dolomades (stuffed grape leaves).
They were so amazing! we decided to try out some of our own from my mom's vines on the Wisconsin farm.


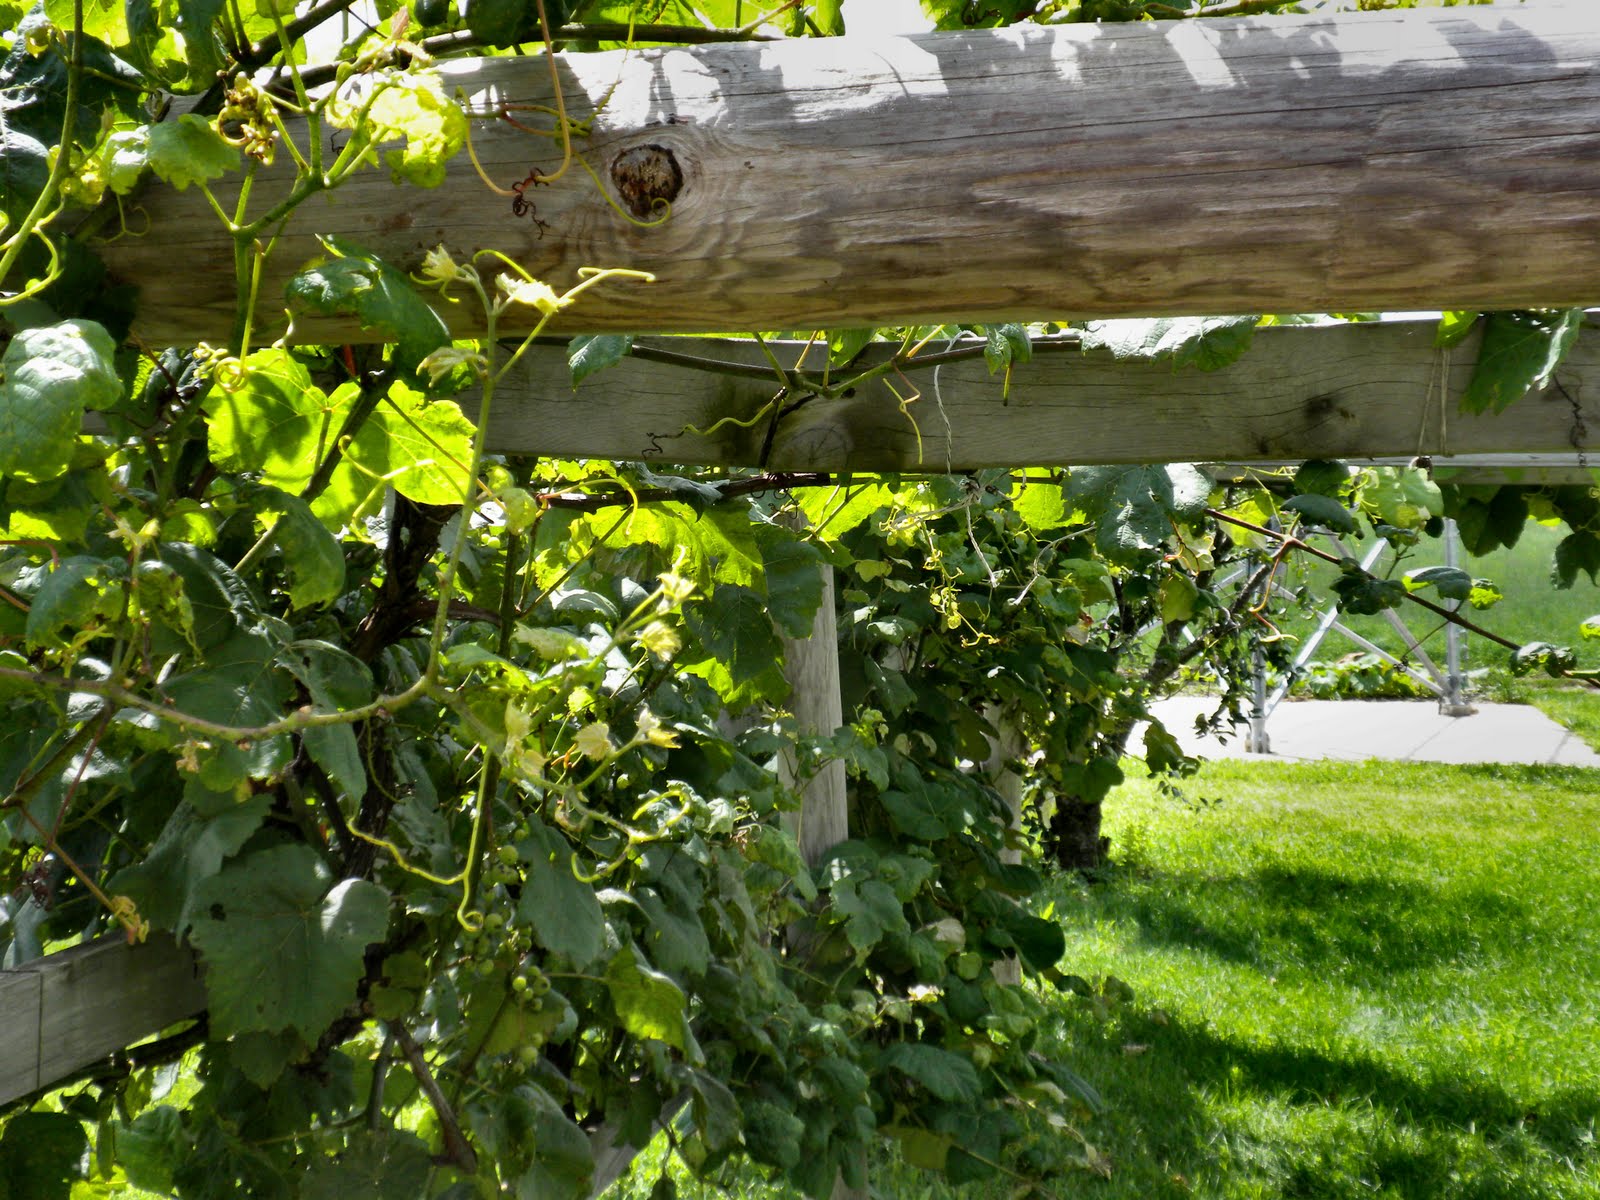
Here's the arbor view of them growing.


I read that the best time for grape leave picking is early spring (May - July) when the leaves a smaller, green, and fresh. So I went for those even though it was late summer....


We washed them, blanched them in hot water, wrapped them into packets of 25-30 (for one pound of meat), filled them in a acid (4 c water, 1/4 c kosher salt, 3 tsp citric acid) bath and then hot water canned them using a large pot (not pressure cooking) for 20 minutes at a boil.


They sure looked nice and I can't wait to use them!!!!

Monday, June 22, 2009

Upside Down


Summer time is great for cool drinks and fruity desserts. I had a jar of canned currents left over from a cooking class and a pineapple that we never grilled up over the week. So I guess it was kind of enevitable. They were canned with sugar, cloves, and a bit of vinager to make them sweet and tangy.

The carmalized pineapple is a favorite of ours to make either sliced on the grill and served as a side to steaks or brushed with sugar and used as a topping on ice cream. Of course everything on the grill is a favorite. In the summer if we aren't grilling it's because it's raining out.

Some cool rain wouldn't be bad right now. It's in the 90's in Minnesota, full into the humid summers that contrast to the freezing winters. Maddie has gotten better about the heat. We used to wrap ice in a towl and lay it on the floor for her to sleep on. She was also a fan of snoozing directly over the vents behind the couches. Now she tolerates the walks and runs outside, but still has trouble with the really hot days. Her fur coat is made for the winter and she loves season, oh boy does she love it!


Pineapple Upside Down Cake
1 pineapple, sliced into hollowed circles
maraschino cherries or tart currents
2 tbsp brown sugar
3 tbsp butter

1 cup flour
1 teaspoon baking powder
1/2 teaspoon salt
2 egg
2/3 cup sugar
1/4 cup milk

Heat butter and brown sugar in a sauce pan till slightly carmalized. Add pineapples and heat through. Remove from heat, let cool, place in a pan and pour remaining carmalized sugar over top. Fill the hollow of the pineapple with cherries or currents.

Combine remaining ingredients in a bowl and beat 1 minute. Pour batter over pineapples. Bake at 350°F for 20-40 min depending on pan size until a toothpick tested in the center is clean.

Let cool. Slice the top of the cake flat and flip over so that the pineapple is on top.

Wednesday, May 20, 2009

Veggie Shells

Spaghetti Squash! Round three! ding, ding ding
I finally used up all of the Spaghetti Squash in this dish and also used some left over veggies. We are still making headway on our CSA box and try to add something extra to each dish.
Since we're also big meat eaters, I just had to add something besides veggies, but substitute immitation bacon for a veggitarian meal or just leave it out.

I enjoy using my homemade stock in recipes like this, where a thicker liquid helps the sauce and overall taste of the dish. The shells are very light on dairy, I'm guessing you could even cut the cheese and milk out completely and still retain the smoothness that comes from the mashed squash.

Squash Stuffed Shells with Asparagus
1 pkg large pasta shells
2 cups squash, cooked and mashed
1 1/2 cups shredded mozzarella
2 tbsp shredded parmesan cheese
2 tbsp extra virgin olive oil
1/2 medium onion
2 cloves garlic
1/4 cup chopped Canadian bacon
2 tbsp cup white wine
1/4 cup stock (veggie or bird)
2 tbsp cream or milk
10-15 stalks Asparagus, washed and cut into 2” pieces
Salt and Pepper to taste

In a large pot of water with salt, boil the pasta shells to directions until al dente (slightly undercooked). Drain and let cool.

In a medium sauce pan heat olive oil and cook onion and garlic with a little salt through until soft and translucent. Separate 1/2 of the onion mixture into a large bowl with the squash, both cheeses, and pepper; mix well.
Stuff the cooled shells with the mixture and place in a shallow baking dish. Preheat oven to 350 degrees.

Heat the remaining onion mixture with the bacon. Add wine and cook down. Add stock and milk heating through. Stir in the asparagus to heat it slightly until it turns a bright green color. Pour over the shells. Add a bit more stock to the bottom of the dish if it appears ‘dry’.

Bake at 350 degrees for 15-20 minutes or until the asparagus is fork tender and the shell mixture is warmed through.

Thursday, May 14, 2009

Using Veggies - Asparagus Risotto

Today is the day we pick up our first CSA share. We are splitting the share with another couple, and we are all so excited to see what will come in the boxes every other week. I think the biggest challenge will be thinking of new ways to use the veggies. While sautéing or steaming has its purposes and is great for quick preparations, it is not always the most interesting thing at every meal.


One bunch of Asparagus magically made it through three meals this week. First it was sautéed in an olive oil, white wine, stone ground mustard mixture. Then it was steamed and mixed with fresh risotto. Finally it was broiled with squash stuffed shells.

Each preparation tasted and looked a little different, keeping the meal interesting and delicious. With all the veggies we should be receiving, keeping it interesting will be the theme of the summer!

Asparagus Risotto
2 tbsp Extra Virgin Olive Oil
1/2 medium onion
2 cloves garlic
1 tsp fresh Oregano
3/4 cup Arborio rice
1/4 white wine
2 cups stock (veggie, chicken, or bird)
2 tbsp milk
8-10 stalks Asparagus, washed and cut into 2” pieces
Salt and Pepper to taste

In a large skillet heat the oil. Add the onion and garlic with a little salt cooking till soft and translucent. Add the oregano and some fresh ground pepper. Increase the heat and add the rice. Let the rice mix with the oil and cook about 5 minutes, do not let the rice brown however.


Slowly add the wine and cook down till. Continue to add stock to the rice, about 1/4 cup at a time, cooking the rice until almost all the liquid is absorbed before adding more. Stir every once in awhile; do not over mix during the later parts of the cooking time or the rice will become mushy. Should take about 10-15 minutes for the stock to absorb.


Meanwhile in a sauté pan heat 2 tbsp of water. Add the asparagus and cover, letting the pieces steam. Set to the side once they are fork tender.

Stir in the steamed asparagus with any remaining liquid from the steaming. Add the milk to the rice and a little more water if the mixture is too sticky or if the rice is not cooked through. Adjust the salt and pepper. Serve immediately while warm.

Wednesday, November 26, 2008

New Twist on an Old Favorite

Thanksgiving… a meal like non-other, comforting and filling; yet many years it seems like the same dishes over and over again. You have your turkey with stuffing, hopefully not too dry. There’s mashed potatoes and gravy. Generally a green bean casserole. Rolls or bread. Throw in some pumpkin and apple pie and your meal is complete.

Completely boring say some.

So what to do? Turkey’s can be basted with fruits to add more flavor. Potatoes mixed with garlic and chives are always a favorite. Why not do a Asian green bean toss instead? Or try some pumpkin muffins and serve a berry pie for desert. All fairly simple substitutions. Some you may hold onto, others stick with the original and you can’t go wrong. But the stuffing… oh the stuffing is something to experiment with!

Remember the Focaccia bread I promised to reuse? Well here’s what became of the rest of it. It was a pre-Thanksgiving meal at our house featuring Louie's sausage and canned beef stock.

Since we are traveling to Chicago for Thanksgiving we took a little time to make our own Turkey a few weeks before. We then spent the weekend in Wisconsin helping my parents around the farm and setting up for their own family meal. No matter how you slice it Thanksgiving reminds us to be thankful and spend with those you love, even if you’re not with them.

Apple Sausage Stuffing
1 loaf Focaccia bread
3/4 cup crushed Italian bread crumbs
3 tbsp Olive Oil
2 carrots, washed and peeled
3 celery stalks, washed
1 large onion
1 green bell pepper
2-3 golden apples
1/2 lbs Italian sausage
3 cloves garlic
1 egg, beaten
1 tsp sage
1 tsp rosemary
3 cups beef stock
Salt and pepper

Cut Focaccia bread into large cubes. Broil in oven on a baking sheet until golden and crispy, do not burn. Remove and let cool in a large bowl.

Heat a large skillet over medium heat. Brown the sausage and remove. Cut up into small pieces if not using ground meat. Add to the bread bowl.

In the same skillet heat the olive oil. Cut up the carrots, celery, apples, pepper, and garlic into bite sized peices, mincing the garlic. Add to the pan and sauté on low until heated through and tender. Add to the bread bowl with the Italian crumbs, beaten egg, herbs, salt and pepper.

Fold gently until mixed. Add the stock slowly until absorbed, mixing gently. Do not over mix.
Place in a sprayed pan that fits the amount you have made.

Bake covered at 350 degrees for 30 minutes. Remove cover and bake another 15 minutes or until top is browned slightly. Can broil if crispier stuffing is desired.

Thursday, November 20, 2008

Season of Squash


With the abundance of squash during the fall comes a flurry of orange and yellow dishes. My recent favorite features roasted Butternut squash and Louie’s Italian sausage. It was based on a recipe from here, but modified to my personal taste and texture. Again, I used the canned beef broth I made.

Roasted Butternut Squash and Sausage Soup
1 large butternut squash, about 3 pounds, halved, seeds removed
1/2 pound Italian sausage (~3 whole links)
3 tablespoons extra virgin olive oil
1/2 teaspoon salt
Freshly ground black pepper
1 large onion, chopped
6 cloves garlic, minced
1 tablespoon chopped fresh rosemary, chopped
3 cups beef broth
1/2 cup heavy cream, or more to taste

Preheat the oven to 400 degrees F.
Lightly coat the squash halves with 1 teaspoon of the olive oil, salt, and pepper on both sides. Place cut-side down on a baking sheet lined with tin foil. Bake until fork tender, about 30-45 minutes, remove from oven and let cool. When the squash has cooled enough to handle, scoop out the flesh and reserve.

In a medium saucepan over medium-high heat sauté the sausage till browned, remove and cut into small pieces. Add remaining olive oil to the pan and cook the onions until soft and opaque. Add the garlic, sage and rosemary; cook, stirring, for 1 minute. In a large soup pot, add the onion mixture, cooked squash, 1/2 the sausage mixture, and chicken stock, stir well to combine, and bring to a boil. Reduce the heat to low, and simmer for 30 minutes, stirring occasionally.

With a hand-held immersion blender, or in batches in a food processor or blender, puree the soup. Add the cream and remaining sausage pieces. Adjust seasoning to taste and add water till thickness desired.

Serve the soup in bowls, garnished with more chopped rosemary leaves.

Wednesday, November 12, 2008

Onion Soup - Antique Style

There aren't many things more comforting than a nice warm cup of soup on a cold day. And when you combine a steamy rich broth with melty cheese and crispy bread crumbs it just warms you up all over.
Onion soup is one of those dishes.

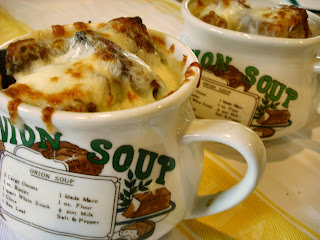
Shopping at a local antique store on near my parent’s farm is always a weekend visit must. There are new treasures on every visit, many of them from the rural Wisconsin farm community, passed on through the generations.

Scanning the shelves packed with dishes I spotted these little soup cups. There was a set with listing recipes for Chicken, Cheese, and Onion Soup. I scooped up the Onion's and waited through the summer till fall.
Finally the weather cooled down and a request for more heart-warming dishes rang in the kitchen. The canning season which was just completed came in handy for that cooked all day taste.

We fired up the stew pot, simmered the onion broth till the house smelled in each room, roasted homemade bread crumbs, melted the cheese, and tried to resist burning our tongues on the steamy soup pulled from the broiler.
It might be the nostalgic soup dishes, but it warmed us to our toes regardless.

Onion Soup
6 medium onions, sliced thinly
2 tbsp olive oil
2 tbsp butter
4 tbsp flour
3 cups chicken or beef stock
1 bay leaf
1/2 tsp sage
1/2 tsp rosemary
1/4 cup cream
1/4 cup milk
Toasted bread crumbs
Mozzarella cheese
salt and pepper to taste

In a large pot heat the onions with the oil till soft. Add the flour and allow to stick to the onions. Add stock, bay leaf, herbs, salt, pepper.
Let simmer for at least 30 minutes, up to 3 hrs.
Add cream and milk. Let simmer till thickned. Removed from heat and spoon into oven safe dishes, leaving 2 inches from the brim.

Place toasted bread crumbs on top of the soup. Pile Mozzarella over the bread crumbs. Place on a tray and broil till cheese is lightly brown and melted.

Remove and let cool slightly.
Goes well with sandwitches, salads, or as a side starter.